

How To Take Screen Shots On Windows
Taking screenshots has now become a daily part of our lives since the advent of modern desktops, laptops, and mobile phones. Nosotros take screenshots to fit our many purposes. The purpose varies from professional life to personal life. In personal life, you take screenshots of desktop content for many reasons like if you are a teacher then you have to make lectures from diverse articles, research papers, etc.

Try it now
 Secure Download
Attempt information technology at present
Secure Download
In a management-similar environment, you accept screenshots to make slides or presentations. Every bit nosotros talk most the academic area, a student needs to capture dozens of screenshots daily to complete his assignments, practice their research, take notes, etc.
- Role 1. How to accept screenshots in Windows 11 with multiple shortcut keys
- Part two. Tips to take screenshots in Windows 11
- Part 3. Taking screenshots in Windows using third party applications
- Function 4. Comparing the applications
In personal terms, unremarkably, yous don't take many screenshots from the desktop as y'all accept a mobile in your hand but all the same you arrive a situation where you have to accept screenshots from the estimator. If you want to adequately communicate the design to the customer or client without speaking and describing also much then you lot need a lot of screenshots for this journey.
There are thousands of cases or scenarios where yous can't draw the point in words or through typing on the paper, you lot need a sample or pictorial representation of that thing in your manus when you lot are communicating with your client. Screenshots come to play in this part.
Let usa consider that yous want to evidence the 3D model of the car you lot developed and you want to approve it from the CEO so you lot will plainly capture the screenshots of the product on that software where you designed that car.
Well, the situation or factor can be anything, y'all take to know how to take screenshots in the newly developed and released Windows 11 or x.
Windows 11 is the newly adult and released version of the Windows NT operating system. It was initially released on Oct 5, 2021. Windows 11 has hundreds of features like information technology has a Mac-like interface, you can run your android applications on windows 11, WIndows 11 has dozens of widgets.
it has pre-integrated MS Teams, Windows 11 also comes with Xbox game stack, It besides has a better transition from desktops to a laptop plus, better multitasking. The characteristic that we are going to discuss here is its screen capturing ability that is loved by everyone since its release.
Windows 11 has fabricated the life of its users piece of cake in many ways through its parcel of features. The same is with the instance of taking screenshots. Whether information technology is Windows 11 or Windows XP, Microsoft has fabricated the working of its user efficient by making its operating arrangement also behave through pressing the combinations of keys.

These keys are known as the shortcut keys. You lot get multiple shortcut keys to accept screenshots efficiently. The working of these shortcut keys is dissimilar from each other. Some shortcut keys just copy your capture on the clipboard and y'all manually have to paste them on the location where you want them to be.

Some shortcut keys don't copy the screenshots on the clipboard. Instead what they do is very dazzling, they simply or automatically make a separate folder inside the moving-picture show folder with the name screenshots and save them there.
Some shortcut keys also save your screenshots on the cloud technology similar Microsoft Onedrive that is pre-installed on your Windows 10 or 11 but you have some configurations that are briefly described beneath.
Apart from shortcut keys, Windows 11 also provides you with a well-known tool that not just captures your screen but besides provides multiple options to edit and modify them.
In this article, we volition tell you how to accept screenshots in Windows 11 using different keyboard shortcut keys plus a well-known tool. We will also tell y'all how to have screenshots with multiple third-party applications.
Part1. How to take screenshots in Windows xi with multiple shortcut keys
There are multiple shortcut keys on your keyboard that y'all can utilize to take screenshots in the quickest fashion. Only with the shortcut keys, you lot will never be allowed to edit them co-ordinate to your ways. The shortcut keys that will employ are.
- PrtScr key
- Window key plus PrtScr primal
- Window cardinal plus shift central plus PrtScr central.
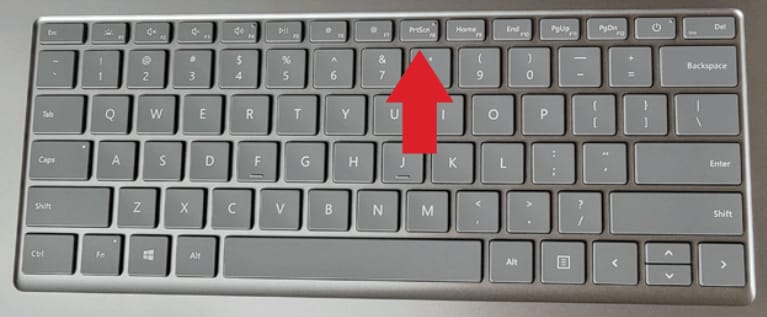
Print screen or PrtScr is the most traditional manner to take screenshots on Windows xi or 10. This key can be in a unlike place on your keyboard every bit it is in the screenshot below. It tin can be in the between or left or right. Some keyboards as well take the PrtScr key below the keyboard.
It captures your unabridged screen in the easiest and quickest way. It doesn't save the screenshot anywhere on the desktop but copies that capture on the clipboard and and so y'all tin can paste that screenshot manually anywhere on windows applications like MS paint, social media platforms, MS Office, Powerpoint, Excel, etc.
Not simply on the windows application, just you tin can also paste it on the web-based applications like on Gmail, or on whatever other social media platform. You can also printing the combination of Alt+PrtScr as information technology captures the whole current running application, and in the same in a higher place mode paste it on the clipboard.
Ways ii
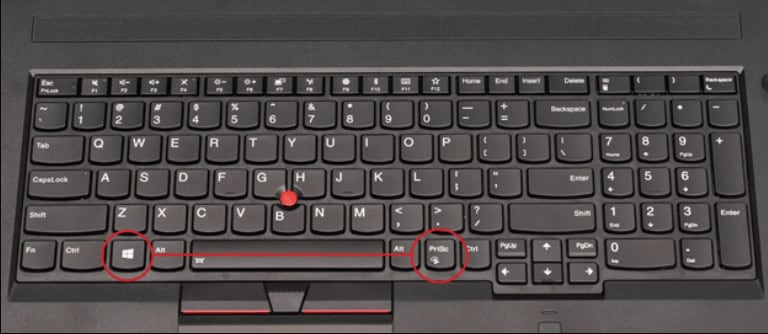
Windows plus Print Screen
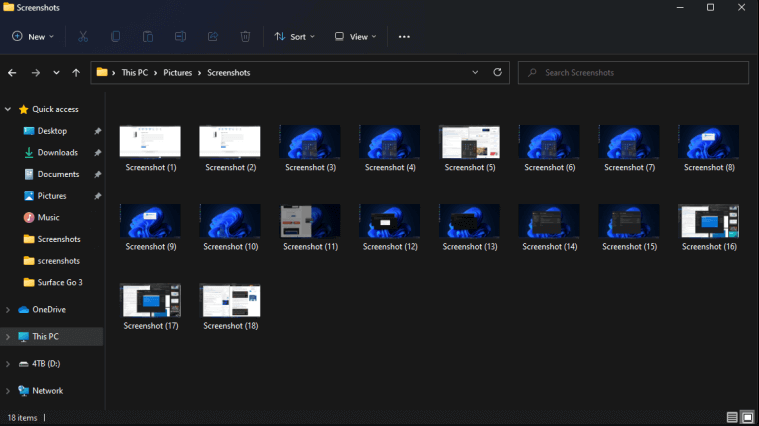
Another best way of taking screenshots in windows 11 or 10 is to utilise the window key plus the prtscr primal. Now, this is the same dazzling selection that we told in a higher place, this configuration will make a carve up binder inside your pictures folder with the name screenshots and so salvage your screenshot there. This selection is for those users who don't want to use the screenshots at the same time they took this capture, equally the users who love to organize their things and want sorted compartments for everything can use this key.
If you don't want to edit or modify your screenshots then it is the nigh efficient way to accept the screenshot. As the selection saves your time and makes the folder so saves the capture there without your concerns.
Ways 3
Utilizing the Snipping tool
Saving screenshots on Onedrive
Onedrive is the deject-based file hosting and synchronization tool developed by Microsoft that in groundwork runs and in a synchronizing way saving your events on Onedrive. Not only your events but you tin also save your documents in it.
You are also allowed to capture your screen so salve it on your one drive folder. But for this highly efficient method, you accept to go through some Onedrive configuration steps to make your screenshots automatically save on the onedrive.
On onedrive, on the right side of the taskbar, click on the cloud icon and so go to the onedrive's settings. From there, click on the fill-in tab from the window that appears after clicking on the deject pick. Then check the option of automatically saving the screenshots. This selection saves your life in many ways.

Now, you don't have to separately brand the screenshot folder on your own or copy it on the clipboard so paste information technology. Y'all just have to press the PrtScr and and so your screenshots volition be automatically saved on the onedrive.
Ways 4
Utilizing the Snipping tool
At that place is another great option for the users of Windows 11 and 10 users. Snipping Tool is the best awarding that is natively installed on the Windows platform and has many other features including editing your captures, styling, drawing on the screenshots, etc.
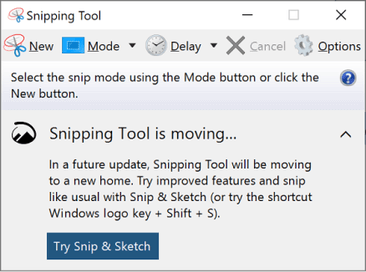
The snipping tool has the capability to take still windows screenshots, rectangular areas, costless form areas. Non only this but, a screenshot from the snipping tool saves its screenshots in GIF, JPEG, and PNG file formats.
All you have to do is press the Windows Key-Shift-S and your piece of work will be done. After pressing these keys, the snipping tool window volition be prompted asking you of how you would capture your screen. If you are having any kind of difficulty in pressing the keys so you tin can manually open it by writing snipping on the search bar and the snipping tool volition be open for y'all.

The options you are seeing as the imperial colour is highlighting these options. The best thing nigh the snipping tool is that the shortcut keys mentioned higher up cannot practise the work like snipping tools. In the snipping tool you can capture a particular part of the screen. You lot just have to gear up the dimensions using the cursor, and as y'all will relieve your cursor, the screenshot volition be taken.
Just explore the snipping tool, you tin too find the choice that allows y'all to edit your screenshots.
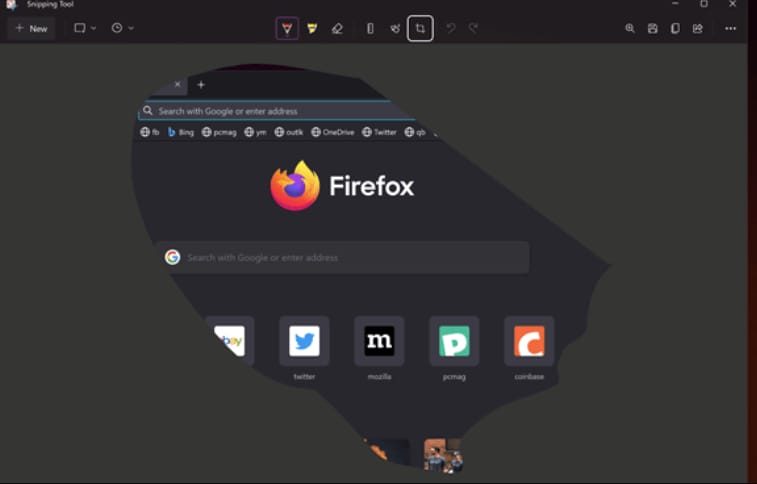
Basically, the snipping tool in Windows xi is the combination of the features that were as well in windows 10. The snipping tool in windows eleven also allows you to set the timer for capturing your screenshots. This feature is the most loved characteristic of the snipping tool.
Part2. Tips to take screenshots in Windows eleven
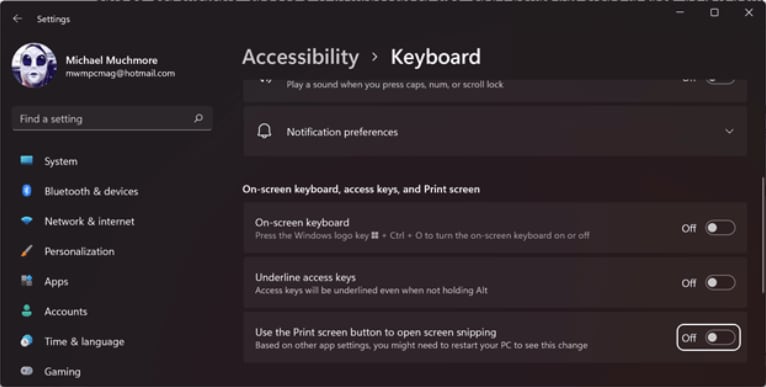
If you lot don't want your screenshots to be saved on the clipboard then you lot tin also change this setting too. All yous have to do is become to your laptop or desktop settings on windows 11 or 10 and then navigate to the Accessibility option and and so select the keyboard selection.
And so on the window that appears after selecting these options, bank check the Use the Print Screen Button to Open Screen snipping. The 2d thing you should consider is that if you use a surface pen stylus then y'all must double-tap the above-mentioned choice and that will open the snipping tool.
Part3. Taking Screenshots in Windows using third party applications
If you don't want to tie yourself to the shortcut keys or the snipping tool then there are hundreds of screenshot capturing applications available on the internet that you can utilize to practice the aforementioned work as those shortcut keys and snipping tools exercise.
The simply departure between the tertiary-party applications and shortcut keys or snipping tools is that the tertiary-party applications not only capture the screenshots but can also tape the screens, edit them, cut, crop, trim them.
You can too add furnishings, filters, stickers, texts to your screenshots using these tools. In this section, we will tell you some of the best third-party applications that will capture your screen and can also edit them in the best way.
Ways five
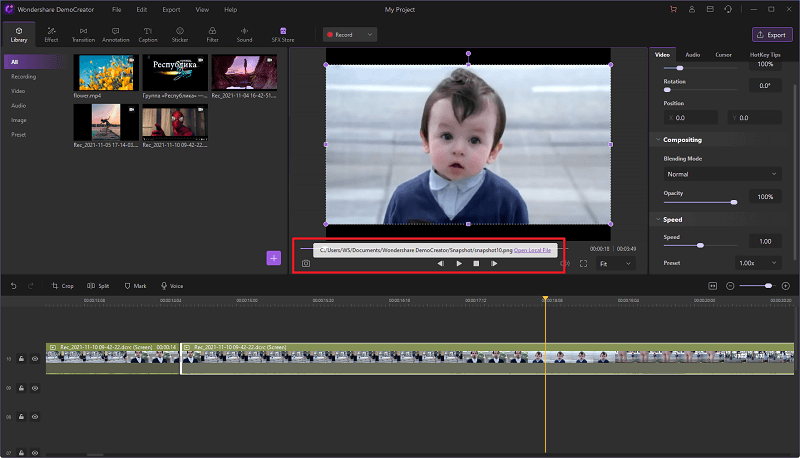
Wondershare DemoCreator
Wondershare DemoCreator is an all-in-one screen recorder and video editor and it also comes with a snapshot function in its video editing features. Y'all tin can take a snapshot for any frame in the video clips with DemoCreator no any disturbing.
How to employ
You need to import your video clips or photos into your DemoCreator editor. Yous tin can also record the motion-picture show or video clips on your PC with DemoCreator, dissever, remove unwanted part and scale, rotate your photos. Merely click the Snapshot button you tin save whatever frame you want to save to your local file.
Try it now
Secure Download
Effort it now
Secure Download
Features:
DemoCreator provides you multiple features like:
- You tin import your photos to make a complete video.
- You can alter the position, scale or rotate the video with ease.
- Yous tin relieve the frame of any clips to your local as a photograph.
- Making a PIP effect will be very piece of cake.
- Applying Blush Key or background removal will be necessary that can be done with DemoCreator.
Pros:
- Dissimilar normal photograph mergers, you can too apply different video transition effects with DemoCreator like elementary roll, cube, box plow, deliquesce, flash, button, erase slide, 3D, mistiness and more.
- You lot tin can import your PowerPoint and make it a slideshow hands with DemoCreator.
- In the recently Version 5.3, they split the media resource into video, sound, and image so you tin can observe your file easily.
- DemoCreator too comes with multiply effects, annotation, caption, stickers, and filters and so that can exist applied in your photo editing.
Cons:
- For photo screenshots in video clips features, at that place volition non be watermarked. But if yous desire to export the unabridged video after editing, in that location volition be a watermark on it.

The Best Tool to Capture Images From Video Files
Record screen, audio and webcam simultaneously or import your video to edit in DemoCreator.
Take screenshots of any frame with a click to salvage to the local file.
Built-in thousands of templates, resources, and effects, edit the video like a pro.
Supports AI Confront Recognition, stress any key point on the recording screen.
Export to MP4, MOV, MKV, GIF and multiple formats, and with high quality.
Free Download
Secure Download
Free Download
Secure Download
DemoCreator is an easy-to-use screen recording software that comes with a costless trial.
What users say most DemoCreator:
The Wondershare DemoCreator is an excellent software awarding for video creators and educational purposes. The product is at one time advanced even so easy-to-utilize. The intuitive user interface and the abundance of useful features make the DemoCreator one of the foremost choices amid creative individuals and commercial organizations.
-https://www.softocoupon.com/
![]()
Means 6
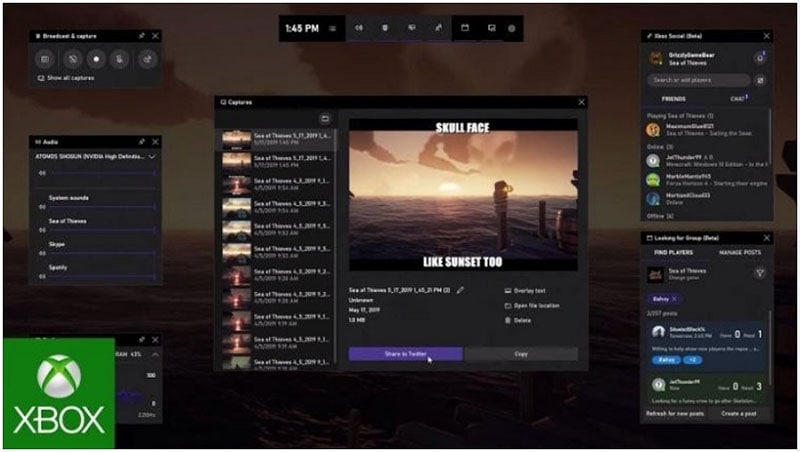
Windows Fundamental Game Bar
Windows Game bar or Xbox game bar is the awarding that is usually pre-installed in Windows just y'all tin install it manually if the case goes opposite for you. This awarding is developed by Microsoft for gamers who besides want to record their gameplay while playing the game.
Non only gameplay recording but you tin can as well take screenshots with this application.
How to apply
WIndows Xbox game bar also provides y'all with the shortcut cardinal to capture your screen. All you have to do is enable the game bar from the settings later installing and downloading it and so press the Win + Alt + PrtSc keys to take the screenshot. The screenshot will be saved on the folder y'all specified while enabling the game bar same from the settings.
Features
Game Bar provides you with multiple features.
- Yous tin can arrange the volume capturing settings using Game Bar. You tin can add unlike settings for different applications using the Game Bar.
- Gamebar as well allows yous to track the CPU, GPU, RAM performances.
- Gamebar also allows you to play music from Spotify and this music will likewise be recorded while recording screens.
- Yous tin also conversation with Game Bar Xbox alive features.
- You can record gameplays efficiently.
Pros
- The advantage of the game bar is that information technology is gratuitous to use or yous can likewise install it complimentary from the official website.
- The operation is dazzling.
- The user interface is very user-friendly.
Con
- Some of the features are not at that place that is necessary to edit the screenshots like calculation stickers, texts, effects, etc.
Lightshot
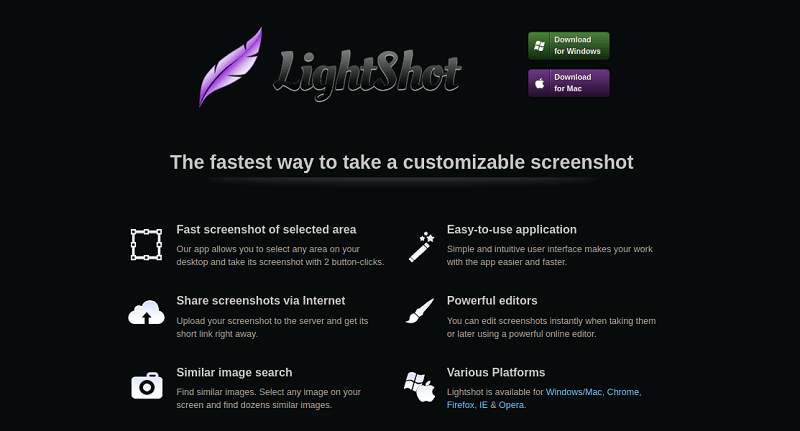
Lightshot is adult by PrtScr.com. This application is very lightweight and yet provides yous every feature that a good screen capturing tool provides. The application is both web-based and tin can exist downloaded on your desktops. You lot can download lightshot on both mac and windows operating systems.
How to use
- Download and install the awarding on your windows and mac desktops.
- Launch the application and so navigate to the screenshot choice of the application. Apply this option and then capture the screenshot.
- At present, y'all can save the captured screenshot on the spider web-based awarding of the lightshot, yous can also upload information technology on Facebook, Twitter, etc, and you can besides save them on localhost.
Features
The all-time features of lightshot are.
- Yous can capture the screenshot by just double-clicking on the particular part of the screen.
- Y'all can share your screenshots on web-based applications.
- You can find similar images of the screenshot.
- Information technology has a powerful editor.
- Lightshot is bachelor for Windows/Mac, Chrome, Firefox, IE & Opera.
Pros
Lightshot has many pros similar
- The application has the all-time convenient interface.
- The application is completely free to employ.
- You can use light shot without any learning tutorial.
Cons
- The application is not available for Linux users.
- Lightshot also lacks many advanced features that other good screenshots or screen recording applications incorporate.
- Lightshot has also a feature that allows you to upload your screenshots on its web-based awarding, simply there are hundreds of security issues and that'south why users refrain from using this feature.
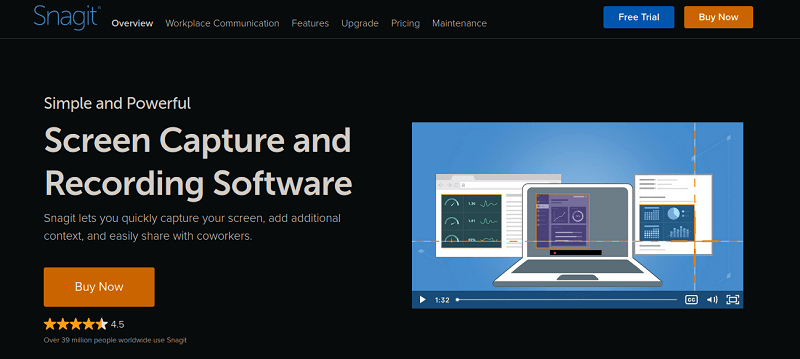
Snagit is the most professional screen recording and capturing tool. Snagit is a powerful tool that lets you capture your screen, customize information technology, and share it with people around the internet.
This application allows y'all to show your customers or clients how to do something via screenshots, and then y'all can besides alter them similar adding texts, captions, annotations, transitions, trimming, cropping, etc.
With Snagit, you tin can also save your snapshots in the video, image, and GIF formats. The application can play the all-time role in your remote work and keep your things short and aligned.
How to use
- Download the awarding afterwards purchasing it.
- Launch the awarding and so click on the red circumvolve push to capture or print your screen.
- Save the screenshots past using the methods provided by the Snagit.
Features
- With Snagit all in one option, you tin can capture your entire desktop, a region, or a scrolling screen.
- Snagit as well provides y'all with panoramic scrolling capture.
- You lot can capture the text that is mentioned in the screenshot.
- The application also provides you with the screen recording option.
- You can likewise record your webcam.
- The application also allows you to tape audio.
- You can as well convert your brusk plays into GIF format later picayune tweaks.
- You can likewise trim your video clips using Snagit.
- You lot tin also add transitions and annotations to your videos.
- With Snagit, yous tin also order your documents past serializing them.
- You share your screen recordings or screenshots virtually anywhere on the internet.
- Hundreds of other tools.
Pros
The principal advantage of Snagit is that you can utilise information technology for professional work and this application as well provides you with the features that are needed in remote or office work.
Cons
The application is completely not complimentary to utilize. You have to purchase it and a trial version is but for a few days.
Greenshot
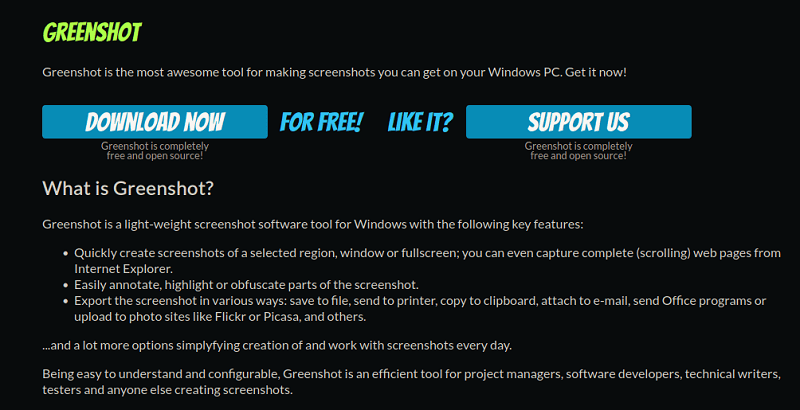
Greenshot is also a skilful option for capturing screenshots. The application is completely free to use.
How to use
- Download the awarding and launch information technology.
- Add the application on your startup menu by clicking on the task tray then preferences and then enabling Launch Greenshot on startup and then OK.
- Then you tin can merely capture using shortcut keys like.
- Print Screen - this pick will let yous capture a part of the screen.
- Shift + Print Screen - You can capture the last region you captured with this shortcut central.
- Alt + Print Screen - with this shortcut cardinal, you can capture the screen y'all are currently working on.
Features
- Yous tin can capture the specific function of the screen, a window you are working on, and the entire screen.
- Y'all can easily highlight, obfuscate, or annotate parts of the screenshot.
- You lot tin can upload your screenshots on other editing applications too.
Pros
- The application is very lightweight.
Cons
- There are no better features in the application than other applications provide.
- But bachelor for Windows users.
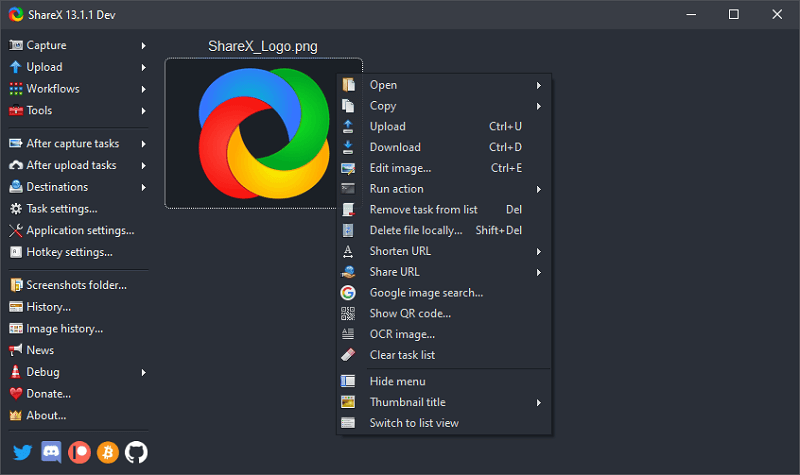
The best free tool for capturing screen recording and pictures. The application is packaged with hundreds of screenshots and video editing tools that volition produce the outcomes in the most dazzling way.
How to Employ
- Download the application.
- Launch the application, and from the main window click on the capture choice.
Features
- You tin hands tape your screen and accept snapshots using ShareX.
- You lot are also immune to stream with the awarding.
- Powerful editing toolbox with hundreds of tools for gratuitous.
Pros
- The awarding is completely free to use.
Cons
- The main problem is that it is simply available for Windows users.
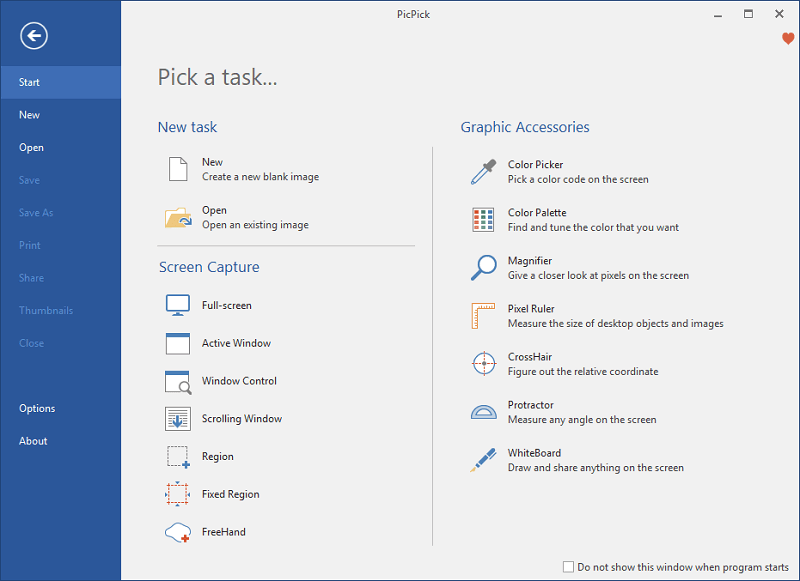
PicPick is an all-in-one graphic designing, screen recording, and capturing application. As the name suggests it has all the tools that you tin can utilize in your designing and screen recording or capturing.
How to use
- Download the application.
- Picpick will exist past default added to your system tray.
- Set any shortcut key for capturing using the awarding and then press that key to capture.
Features
- Editing and enhancing the screenshots using the graphic designing tools.
- You lot can share your results anywhere on the internet.
Pros
- The application is completely user-friendly.
Con
- For advanced features, you have to buy the awarding.
Means 12
Crawly Screenshot
Crawly screenshot or screen recorder is the web-based application that is available for the chrome users. It's the extension that you take to add together on your chrome browser in lodge to use it. The awarding is both a screen recorder and a capture.
How to apply
- You tin add this extension on your chrome.
- Then from your extension listing on the top left corner, launch the application.
- And then it volition give you lot options to record or capture the screen.
Features
- Easy to utilise.
- Powerful editor.
- You can record the screen and capture the screenshots.
- Add together the phonation over your videos.
- Share anywhere.
Pros
- The application is lightweight.
Cons
- Not available for browsers other than chrome.
Part4. Comparison the applications
| Features | Capture Total Screen | Capture Screen Area | Edit Screenshots (Notation) | Instant Sharing | Automatic Upload |
| GameBar | ✅ | ✅ | ❌ | ✅ | ✅ |
| Lightshot | ✅ | ✅ | ✅ | ✅ | ✅ |
| Snagit | ✅ | ✅ | ✅ | ✅ | ✅ |
| Greenshot | ✅ | ✅ | ❌ | ❌ | ❌ |
| ShareX | ✅ | ✅ | ✅ | ✅ | ✅ |
| PicPick | ✅ | ✅ | ✅ | ✅ | ✅ |
| Awesome Screenshot | ✅ | ✅ | ❌ | ✅ | ✅ |
You tin choose whatever awarding that best fits your needs.

How To Take Screen Shots On Windows,
Source: https://democreator.wondershare.com/take-screenshot/take-screenshot-windows-11.html
Posted by: landermomp1940.blogspot.com
0 Response to "How To Take Screen Shots On Windows"
Post a Comment